I get it—seeing your plants wilt under the grow light feels like a nightmare. Take a deep breath; this is fixable. You’re absolutely not alone. I nearly lost half my seedlings the first time I tried using an LED grow light, so if you’re panicking over crispy, drooping leaves or brown spots, you’re in good company.
If your plants are dying under grow light, let’s troubleshoot this together. We’ll talk real numbers (I lost almost $50 in seeds and supplies before I figured this out), realistic timelines (3–7 days for recovery if you act now), and break down how LED grow lights, photoperiodism, and plant photosynthesis actually play a role in your plants’ bounce-back.
Common Reasons Plants Are Dying Under Grow Lights and How to Fix Them
Let’s get right into it, because I know you want answers—fast. Here’s what I learned after spending way too much money and time panicking over my first grow light setup.
1. Light Distance: Too Close or Too Far?
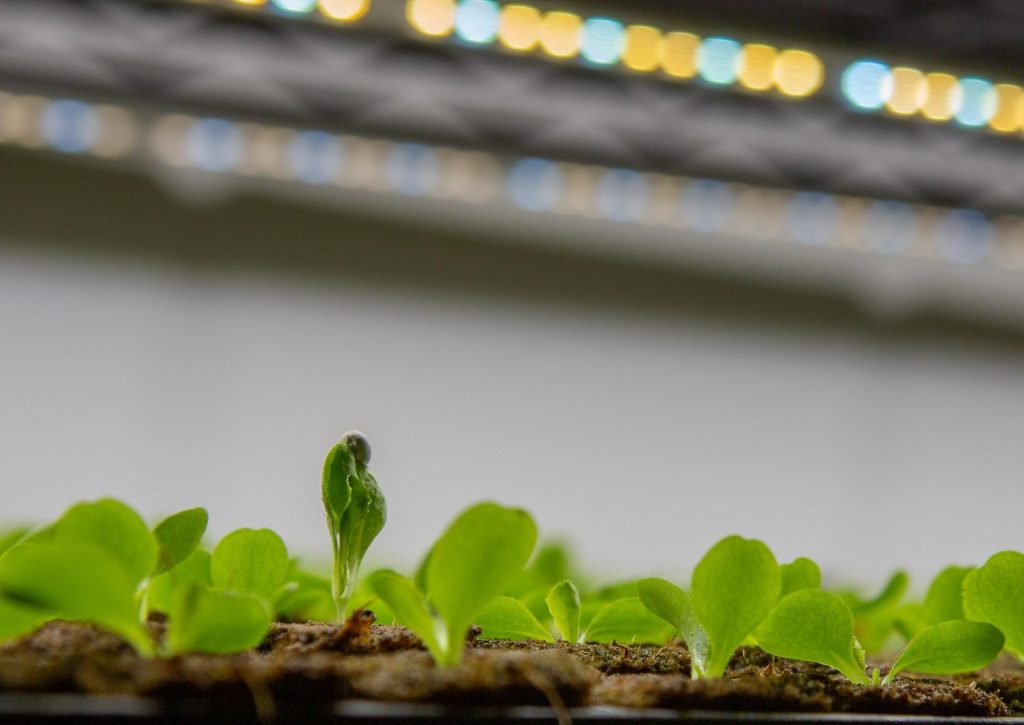
Hold up—I need to be honest about something here. I used to think “the closer the better” when it came to my LED grow light. That was a disaster. I had my light about 6 inches above my seedlings, thinking it would help them grow strong. Instead, half of them got brown, almost crispy leaves within a week. I lost about $50 in seeds and supplies that round. It was such a gut punch.
The fix? Once I moved my LED grow light to about 12 inches above the plants and checked that it wasn’t blasting them directly, things started turning around. Within 3–7 days, those sad, wilted seedlings perked up and the new leaves came in green again. It’s wild how adjusting light distance can literally save your plants overnight.
Pro tip: The sweet spot for most LEDs is 12–18 inches above the foliage. Too close, and you’ll scorch them. Too far, and they’ll stretch and weaken. If you’re unsure, invest in a cheap light meter—mine was $20 and it saved so much guesswork.
2. Incorrect Light Spectrum Confusion
Wait, I should probably mention something important: not all LED grow lights are created equal. I made the mistake of buying a super cheap one off Amazon, thinking “hey, light is light, right?” Wrong. Quality LEDs provide the blue and red spectrum your plants need for photosynthesis. If your grow light is missing the right wavelengths, your plants will get leggy, pale, and, yes, can even start dying.
After swapping my bulb for one that specifically said “full spectrum for plant growth,” my plants started recovering. Now, I always check for spectrum specs before buying a new fixture. It’s worth the extra $10-20 for peace of mind.
3. Photoperiodism and Timer Settings
Actually, let me correct myself on that—light distance is huge, but timer settings are just as critical. I didn’t understand photoperiodism at first. Basically, plants need regular light/dark cycles to know when to grow and when to rest. When I left my grow light on 24/7 (thinking “more light = faster growth!”) my poor seedlings ended up stressed out and droopy.
The solution? I bought a basic plant light timer (mine was $8) and set it for 16 hours of light, 8 hours of dark. Within a week, I noticed sturdier stems and new growth that actually looked healthy. Now, I never grow without a timer—it removes all the guesswork and calms my anxiety.
Side note: Photoperiodism is just a fancy way of saying “plants need a sleep schedule.” Mimicking natural day/night cycles is what keeps them thriving. It’s amazing how much better I felt once I trusted the timer to handle it for me.
4. Brown Leaves: What They Really Mean
But here’s where I messed up at the start: I thought brown leaves meant the plant was doomed. Turns out, brown tips or crispy patches usually mean the light is too close, or the spectrum is off—not necessarily that your plant is a lost cause. If you fix the problem quickly (move the light, adjust spectrum, use a timer), most plants will push out new, healthy growth in just a week. Some of my “crispiest” seedlings are now the biggest in my collection.
Real talk: Don’t cut off all the brown leaves immediately. Give your plant a week after making fixes. If you see fresh, green growth, you’re on the right track.
For more on the science behind why light cycles matter, check out my full photoperiodism guide—it’s honestly the best thing I ever learned for long-term plant health.
FAQ: Your Biggest Fears About Plants Dying Under Grow Lights
Are my plants beyond saving if they have brown leaves under the grow light?
I get how scary brown leaves can look, but don’t lose hope just yet. I burnt some seedlings’ leaves before I figured out my light was too close, but they bounced back after I adjusted it. Try moving your LED grow light further away (shoot for 12 inches) and limit exposure with a timer. Most plants show signs of recovery in 3–7 days with proper care. Remember, understanding photosynthesis and using the right light spectrum supports leaf healing.
How do I know if my grow light timer is set correctly?
It’s confusing at first—I was overwhelmed trying to get the timing right too. I learned that setting my plant light timer to mimic natural photoperiodism helped my plants stop wilting. Most plants thrive with 12–16 hours of light daily; adjust based on your plant type and monitor how they respond. You should see sturdier growth and less stress within a week. Timers really do help regulate photoperiodism, so your plants get the rest and light they need.
Conclusion: You and Your Plants CAN Bounce Back—Here’s How
I know how tough it is to watch your plants struggle, but your willingness to learn shows real care. Start today: adjust your LED grow light distance, check your timer, and watch for improvements over the next week. Keep checking back here or reach out if things still feel uncertain—I’m rooting (no pun intended) for you and your plants.
If you have questions or want to share your progress, I’m here to listen and help. Remember, many growers—including me—have been exactly where you are and came through stronger. With your LED grow light and a good timer, you’re setting your plants up for healthy photosynthesis, proper photoperiodism, and lush growth.
For more details on choosing the best lights, check out my equipment reviews.