There’s something genuinely uplifting about the simplicity of daisies—a little burst of sunshine that instantly brightens whatever they touch. Daisy borders? They’re like the perfect frame for that feeling, wrapping your project in a friendly, effortlessly happy vibe. I’ve played with daisy borders on everything from birthday cards to fabric patches, and what I’ve learned is: they’re ridiculously versatile, and you don’t need to be a pro artist to make them sing.
Here’s the inside scoop from my own creative experiments and some tricks I’ve picked up that you won’t find on every tutorial.
What Makes a Daisy Border Really Work?
Most people think daisy borders just mean repeating the classic white-petal, yellow-center daisy in a straight line. But what really gives them life is the way you connect those dots. For example, instead of placing daisies in rigid, equal spacing, try clustering some a bit closer and others farther apart. This subtle irregularity mimics how daisies grow in nature and adds a relaxed, organic feel that feels warm, not mechanical.
When I don’t want a full leafy or vine motif, I like to introduce tiny hand-drawn touches between the daisies—little buds, dots, or even swirly lines—just enough so your eye travels around the border instead of just stopping at each flower.
Choosing the Right Medium is Half the Fun (and Key to Success)
I once tried applying a delicate daisy border on a canvas tote bag with fabric paint. The first time, I used a large stencil and got this super graphic, bold pattern. It’s cool, but a bit harsh for daisies, right? So, on the second attempt, I switched to freehand embroidery with simple lazy daisy stitches for petals. The softness and slight variation in each stitch brought the border to life in a way no stencil could.
If you’re working digitally, my favorite cheat is finding a floral brush set in Procreate or Photoshop. Instead of stamping one daisy at a time, you can “paint” a flowing chain of flowers, shifting size and angles as you go. It feels like doodling but keeps everything neat. (Check out Creative Market for great brush sets).
How to Create a Daisy Border That Feels Authentic (Not Cookie-Cutter)
Step 1: Start With Your Base Daisy
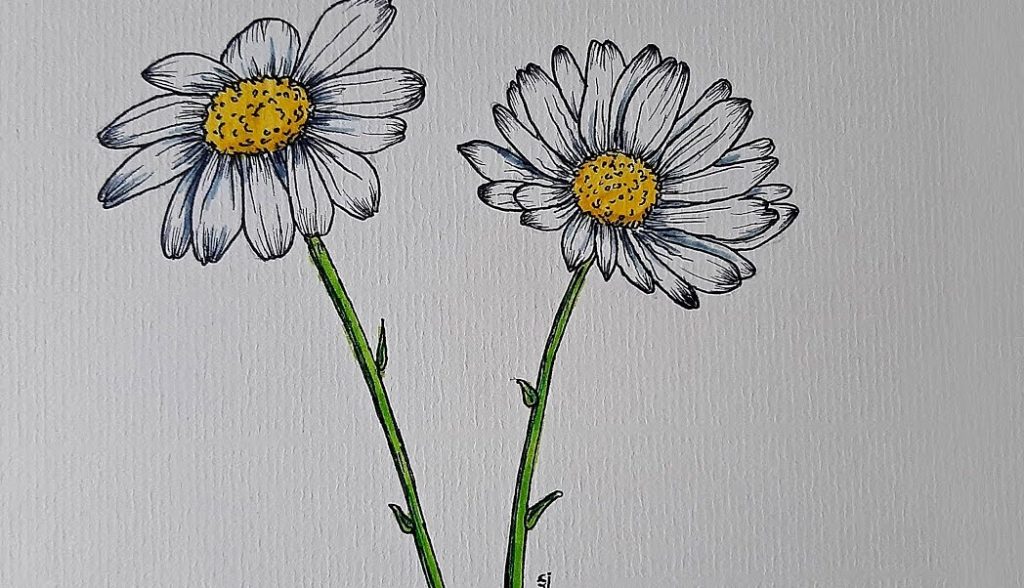
Don’t stress about nailing a perfect daisy right away. My breakthrough was breaking the flower into simple shapes: a small circle for the center, and around it, 5-7 loose oval petals. Don’t make the petals symmetrical—a little wobble adds charm. I purposely make some petals overlap or tilt a bit, because nature isn’t serious about perfection.
If drawing feels intimidating, print out a favorite daisy clipart and trace it lightly for a consistent shape, then embellish it your way—adding dots or shading with colored pencils.
Step 2: Add Personality With Linking Details
Try connecting daisies with tiny vines, but here’s a trick most don’t mention: instead of drawing long vines, just sketch short, curved strokes or leaves between flowers. It feels less forced, more casual. Or, place small dots or starbursts to hint at pollen or morning dew. These details make your border feel like a story, not just a pattern.
Step 3: Play With Scale and Color
As you place daisies, mix sizes. A handful of larger flowers paired with smaller ones prevents your border from feeling flat. Also, while classic daisies with white petals and yellow centers are a staple, try gentle pastels or even a burst of unexpected colors for the petals. I once made a border with soft lavender petals and mustard-yellow centers on a homemade journal cover—it looked fresh and modern, with a nostalgic touch.
Real-Life Inspirations I’ve Loved
- Scrapbooking: One time, I layered tiny fabric daisies along the page edges and added a subtle wash of yellow watercolor beneath. It felt like those pages were glowing softly, and the fabric added tactile charm you just don’t get with paper alone.
- Handmade Cards: I’ve gifted cards with hand-painted daisy borders, but instead of painting perfect petals, I got loose and wet with watercolors, letting the colors bleed slightly. That imperfect, flowy edge made each card feel completely unique.
- Digital Invites: When I made birthday invitations for a spring party, I used a digital brush that created daisies with little leaves and playful swirls. I layered them with a subtle drop shadow so the border popped off the screen, creating depth that made the invite feel polished yet joyful.
Overcoming Common Hurdles (What Most People Don’t Talk About)
- No drawing skills? No problem. I was stuck here too until I realized you can slice and dice clipart. Print a sheet of daisies, cut them out, and arrange them physically along edges before gluing. They don’t have to be perfect or spaced exactly—trust your eye, not a ruler, to place them slightly unevenly for warmth.
- Struggling to space evenly? I use washi tape with marks as a flexible guide—it doesn’t stick super hard, so you can move your flowers around until the rhythm feels right.
- Worried about overdoing it? Less is more. I once made a journal where I added just a few daisies in two corners and some soft smudges of color—the minimal approach was surprisingly elegant.
- Too much detail making it complicated? Strip it down. Daisy centers plus petals only, no vines, no leaves. A barebones border can be incredibly charming if you nail balance and flow.
Confidence Boost: Your Imperfections Will Shine
The beauty of daisy borders isn’t found in flawless precision—it’s in their joyful, welcoming energy. When I started experimenting, I gave myself permission to make mistakes and call them design choices. That mindset opened up so much more creativity and unexpected happiness in how my projects turned out.
Take a Small Step Now
Find a blank card, open your favorite design app, or grab a journal. Then:
- Search for a simple daisy clipart (Pinterest or free graphic sites are goldmines).
- Try placing your daisies along just one edge, spacing loosely.
- Add a few leaves or dots to create rhythm.
- Step back, breathe, and enjoy the brightness you just added.
- If you feel ambitious, scale up by varying size or layering color like a pro.
Playing with daisy borders isn’t just decoration—it’s a way to invite a little cheerfulness and nature’s calm into your everyday creations. And honestly? Once you start, it’s hard not to keep coming back for more.
If you want, I can recommend specific brush packs, embroidery stitches, or even some quirky cut-and-paste templates that make making your own daisy border a joyful breeze. Just say the word!