I remember the first time I planted a chitalpa tree—it was a mix of excitement and nervousness because I wasn’t entirely sure if I was picking the right spot. What I quickly learned is that where you place your chitalpa can make or break its success, and it’s not just about digging a hole and hoping for the best. Over time, I’ve found some nuances that aren’t in every guide, and those little insights make a huge difference.
Why the Right Spot Matters More Than You Think
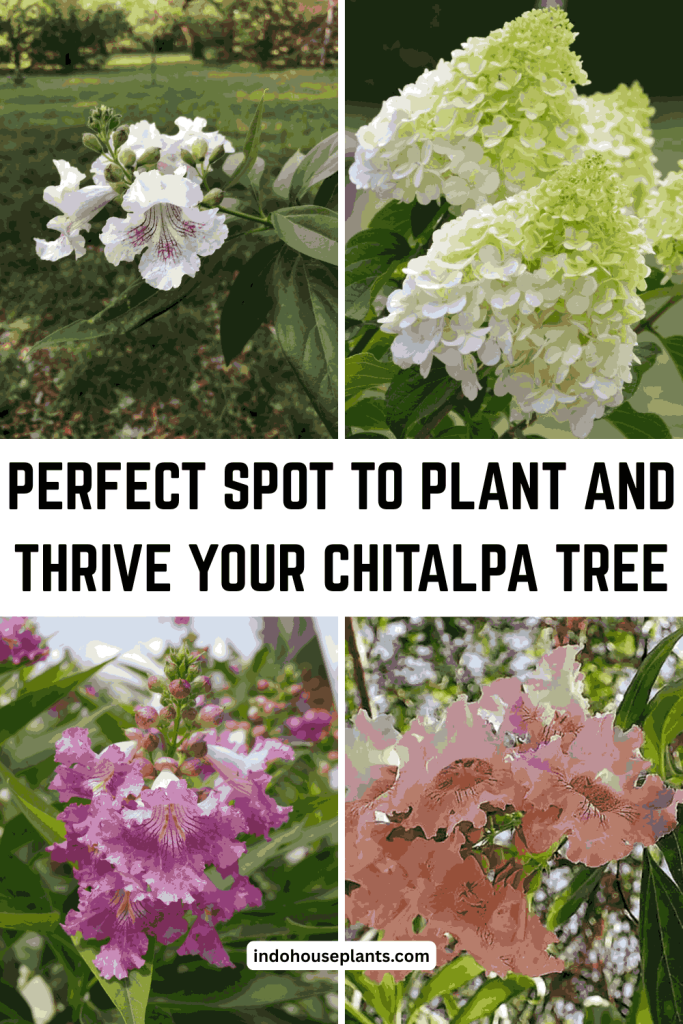
Chitalpas are these stunning hybrids, a bit like the rebel kids of the tree world—part catalpa, part desert willow. They thrive in full sun and need well-draining soil, but here’s what most people don’t know: they’re surprisingly forgiving once they settle in, but only if you start them off right.
I’ve seen chitalpas sulk with droopy leaves when planted in too much shade or suffocate in heavy clay soil that just won’t dry out. It’s almost like they have a sixth sense about their “comfort zone.”
The six hours of sun rule isn’t just a number—it’s their daily dose of energy. Without it, their flowers don’t show up or look vibrant, and their leaves turn pale. Think of it like us skipping breakfast for days and wondering why we don’t feel great.
Real Talk: Finding the Perfect Spot in Your Yard
When I scoped out my yard for the first tree, I actually walked around multiple times during the day, pencil and notebook in hand (I’m one of those people!). I observed where the sun hit, how long it lasted, and how the soil felt underfoot. That hands-on approach helped me avoid guesswork.
If your yard’s a bit tricky, here’s a little trick I picked up: try placing pots in different spots for a few weeks before planting the tree. Water the pots the same way you would the tree and see how those plants do. It’s like a low-stakes rehearsal.
How I Tackled Drainage Issues
If you’ve got clay soil like I did, don’t despair. Doing the “hole water test” is a solid start, but if water hangs around too long, you can create your own little oasis by building a raised bed or mound.
I mixed sandy soil and compost to lighten my clay, and my chitalpa loved it. Bonus: raised planting helps keep pests at bay since the soil warms up quicker in spring.
Space Is More Than a Number
People say “give it 15 feet,” and that’s good advice, but I’ve found that also watching how wind passes through your yard plays a big role. My tree was planted away from wind tunnels created by fences and garage corners, which kept its branches intact through some brutal spring storms.
If you’re on a windy lot, planting near a hedge or installing a simple windbreak can reduce stress on your tree.
Placement with Purpose
I planted my chitalpa just off the patio, where I could enjoy its dappled shade and watch hummingbirds visit the trumpet-shaped blooms. It wasn’t just about growing a tree; it was about creating a little daily joy spot.
Think about where you want those moments, too. Maybe it’s the driveway for curb appeal, or a corner that’s always too hot and bare. The chitalpa’s delicate flowers and light canopy can soften tough spaces beautifully.
What I’ve Seen Go Wrong (And How to Fix It)
- Yellow leaves or weak flowering? I had that happen when a neighbor’s tree cast more shade than I realized during late afternoons. Moving my chitalpa a few feet into better light perked it right up.
- Soggy base or trunk softening? That’s root rot knocking. Improving drainage with organic amendments and sometimes digging trenches to divert water helped the tree recover.
- Branches breaking in storms? I learned to do light pruning to remove weak or crossing branches. Plus, adding windbreaks has kept the tree intact during heavy winds.
Your Action Plan (From Someone Who’s Been There)
- Scout your yard at different times: Track where the sun shines for at least 6 hours. Don’t rush this—it pays off.
- Try the drainage test: If the water lingers, don’t panic. Prepare to amend soil or use raised beds.
- Map out space: Draw a simple map showing your chitalpa’s future “footprint.” Remember, it’s a medium-sized tree that wants breathing room.
- Prep the soil like a pro: Loosen the soil deeply and mix in compost or sandy loam. I always think of this as a welcome mat for the roots.
- Plant with care: Once your spot is ready, place your tree facing south or wherever it gets the best sun, water thoroughly after planting, and mulch around the base—but keep that mulch a few inches away from the trunk to prevent rot.
Planting a chitalpa isn’t just about adding greenery—it’s about inviting a little piece of summer magic into your yard every year. If I managed to get mine thriving (after some trial and error), you absolutely can, too.
The tree will repay you with fragrant flowers and shade for decades, and you’ll get to watch it grow alongside your own gardening confidence. Keep an open mind, and don’t hesitate to test and adapt. Gardening is as much about patience as it is about preparation—and that’s the secret nobody really tells you upfront.